


(and how to create one in your email system!)
I get it, email marketing can feel super overwhelming when you’re first starting.
Thankfully, it doesn’t take rocket science to build great funnels. Instead, it just takes some simple formulas to follow (like the one I’m going to share with you today!)
But before we dive into the “how”, let’s talk about the “what” and the “why.”
What is a Welcome Sequence?
Quite simply, a welcome sequence is a funnel for new subscribers to your email list.
Not sure what a funnel is? Check out this post all about marketing funnels 101!
One of the biggest mistakes I see business owners make is someone opts into their list, let’s say for a free guide, and then they deliver the freebie and call it a day.
Please don’t make this same mistake!
If you’re only ever emailing someone right after they opt-in and then randomly as needed (or worse, when you’re trying to sell something), you’re leaving a LOT on the table in terms of nurturing that relationship and building trust.
A welcome sequence is your way to share who you are, show them what you do, build a relationship, foster engagement, and establish yourself as a thought leader/expert in your industry.
Did you know 👉 Sending welcome emails to subscribers increases engagement by 33%?!
If that doesn’t motivate you to add in a welcome funnel, let this stat sink in: a new subscriber is 3x more likely to buy from you. So your welcome sequence is a great way to add value and share an offer, product, or service that can drive revenue (even passively!).
What to Write in Your Welcome Email
Before you worry about the tech, let’s talk about what you’ll want to include in your welcome email.
Your welcome email is a standalone email (meaning it’s not the delivery of an opt-in or webinar confirmation) and should include information that creates a deeper connection, establishes trust, and encourages engagement with your new subscriber.
Here are a few ideas for what you could include in your welcome email:
- A short intro about you (don’t tell your whole life story just yet… save that for the nurture sequence!)
- Tell them why you’re excited they’re on your list (ex: “you’re in the right place if…”)
- Set expectations (how frequently will you email them, what type of content will you share, etc)
- Highlight some of your best blogs, resources, freebies, or tools (show off your stuff & establish yourself as the expert you are – while providing killer value)
- Ask relevant questions to foster engagement (get them to reply back!)
✨Pro tip: Wanna sneak my welcome email & nurture sequence (plus get some killer weekly marketing & biz tips)? Join my email fam here!
How to Create a Welcome Email
Ahhh the tech of email marketing 😍
If you don’t geek out over all of the techy parts of business, fear not friend! In this section, I’m going to walk you through exactly how to create a welcome email in three of the most popular email service providers for entrepreneurs: Flodesk, Drip, and Convertkit.
Have a question on which email service provider is right for you? Leave a comment below or shoot me a message on insta @jordanjones.co!
How to Create a Welcome Email in Flodesk
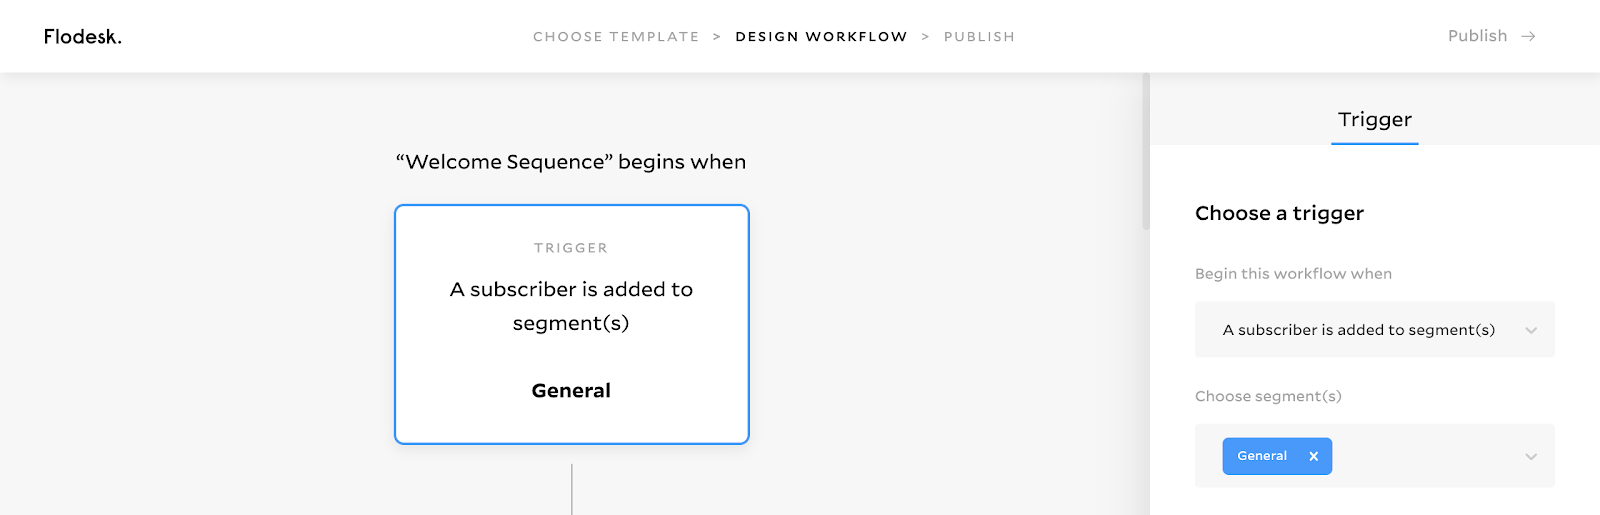
If you’re using Flodesk, you’ll want to create your welcome email in a Workflow, so go ahead and click the Workflows tab in the top navigation bar.
Click the “+ Create New” button and name your workflow “Welcome Sequence.”
Next, you’ll need to set a trigger for this workflow. Click the blue “Add trigger” button. In the right-side dashboard, under “Begin this workflow when” click “A subscriber is added to segment(s)”.
If you don’t already have a “general” segment set up, I recommend creating a new segment called “General” to trigger the workflow. This will be your catchall general list.
You’ll then want to create the “+” button. You’ll have a few options to choose from:

If you want to send the welcome email immediately after someone joins your list (in tandem with anything else you may be sending to deliver a freebie, confirm a webinar registration, etc) then click “Email.” If you want to add a delay (like sending one day later), you’ll want to add a Time Delay first.
We’re going to assume you want to send the first email immediately, so click Email and craft an amazing welcome email!
From here, you can add additional emails (separated by time delays) depending on how you’d like to nurture your subscribers. You can learn more about nurturing sequences here!
Save and publish your workflow when complete. But wait up! You’re not done yet.
You want to make sure all new subscribers trigger this workflow – aka are added to the “general” segment.
To do this, make sure that all of your opt-in workflows end with an Action Step. For example, if someone submits a form for a free guide, in that workflow you would have:
- A trigger for the free guide segment/form
- An email to deliver the free guide
- An action step to add the subscriber to the segment “general”
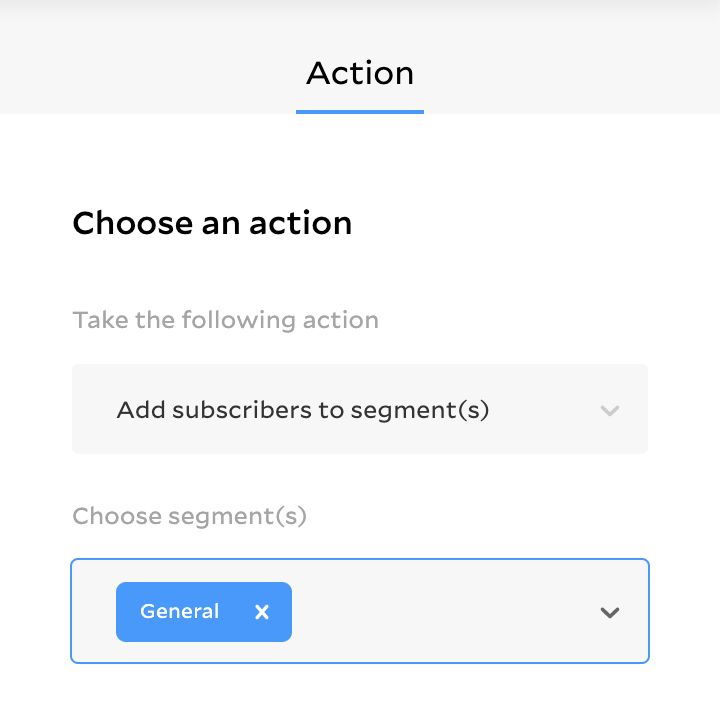
This way, you’ll ensure that every person who joins your email list – no matter how they opted in – will always be added to your general segment (aka triggering the welcome email!).
Do this for EVERY form and opt in you have.
✨Pro Tip: Save 50% off your Flodesk subscription with my referral link!
How to Create a Welcome Email in Drip
If you’re using Drip, you can create your welcome email in a Campaign or a Workflow. To keep things simple, we’re going to create it as a Campaign. So go ahead and click Campaigns in the top navigation bar.
Click the pink “+ New Campaign” button and name your welcome campaign.

You’ll automatically start in the Emails tab, so go ahead and write your amazing new welcome email! I prefer the “Start from scratch” option, but that’s totally up to you!
Once you’ve written your email, navigate over to the Settings tab. Since this is a welcome email that you want to send out whenever a new person subscribes, I recommend selecting every day of the week to send the email and unselecting the double opt-in confirmation option.
When your email and settings are correct, hit the drop-down the says “Draft” and select “Activate” to publish your email and campaign.

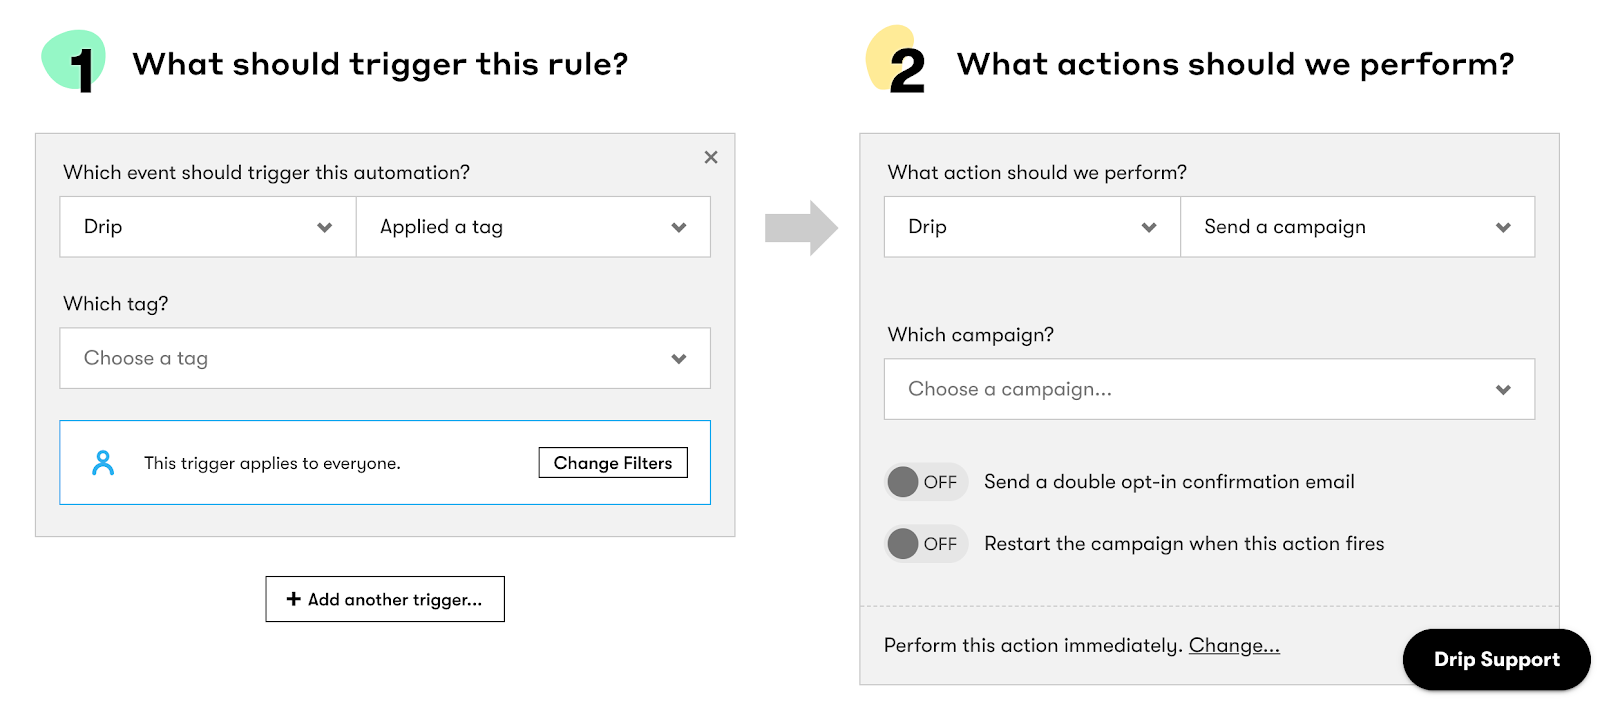
Now that your welcome email is set up, you’ll want to create the triggers to send it. There are a few ways to do this in Drip:
This first option is to create a tag for new subscribers (ex: “General” or “New Subscriber”). Make sure all new subscribers receive that tag, then create a Rule that when the Tag is added then send the welcome campaign:
The second option (a little more tedious) is in every opt-in workflow, add two steps:
- First, add a decisive action to check if the person is subscribed to the welcome email
- If No, then add the person to that campaign
- If yes, then exit the workflow (they’ve already received the welcome campaign, meaning they were already on your list)
How to Create a Welcome Email in Convertkit
If you’re using Convertkit, you’ll want to create your welcome email in a Sequence, so go ahead and click the Sequences tab in the top navigation bar.
Click the “New Sequence” button and name your sequence “Welcome Sequence.”
You’ll then write your amazing welcome email! Time to wow them ✊
Note: Convertkit will default to a 1-day delay for sending your email. If you want to send the welcome email immediately after someone joins your list (in tandem with anything else you may be sending to deliver a freebie, confirm a webinar registration, etc) then change the 1-day delay to 0 days and it’ll say “immediately” under “When to Send” like below:

From here, you can add additional emails (separated by time delays) depending on how you’d like to nurture your subscribers. You can learn more about nurturing sequences here!
Save and publish your sequence when complete. But hold up! You’re not done yet.
Next, you’ll need to set an automation or rule to trigger this sequence to send.
There are quite a few ways to do this in Convertkit, but to keep it easy, I’ll show you how to trigger this based on adding a new tag.
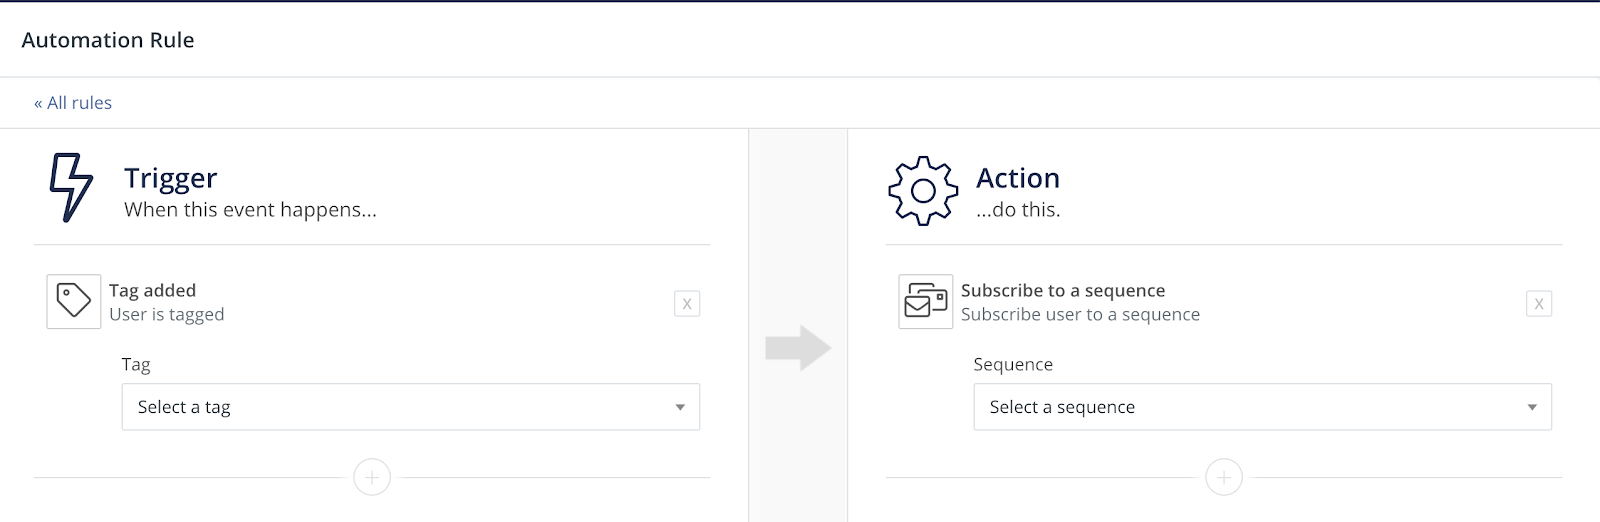
Create a tag in your Convertkit that will flag all new subscribers (ex: “General” or “New Subscriber”). Then go to Automations → Rules and click the pink button that says “+ Add Rule”.
For the Trigger click “Tag Added” and select the tag you’d like to use (ex: “General”). For the Action click “Subscribe to a Sequence” and select the new welcome sequence that you just created.

Once you’ve created this rule, you’ll want to make sure all new subscribers trigger this workflow – aka are added to the “general” segment.
To do this, make sure that all of your opt-in workflows (“automations” in Convertkit) end with a step that adds the new tag (Ex: “General”) to the subscriber. If you have a general opt-in form on your website, you’ll want to create a rule that whenever someone subscribes to the form, then this tag is added (so it triggers the welcome email).
Adding Nurture Sequences
Yay! You’ve built your first welcome sequence – have I mentioned how proud I am?!
Adding that ONE piece into your business can have a pretty major impact, so I’m really stinking pumped for you!
While this is a GREAT place to get started, let’s not let it end there. Once you have a killer welcome email or sequence in place, it’s time to think about how you can nurture those leads and subscribers.


View comments
+ Leave a comment